Time clearly is an ever-evolving thing. It drags. It flies by. It can be lost. It seemed ludicrous that people were preparing for Christmas before Halloween. Then time bended and flat out disappeared and suddenly, Christmas was four days away. I had gifts to buy, prepare and wrap. Unfortunately I didn’t have the time to prepare the amazing blogging extravaganza I had planned for The Saturday Chef’s first Christmas. *sigh* After a snow/ice/rain storm was forecasted as a Christmas disaster, and ended up being completely lackluster, I literally spent Christmas Day in the kitchen, making cookies, braising meats, dipping Oreo truffles, and making granola because our cancelled Christmas plans were suddenly back on.
So, um, here are the next two recipes for Saturday Chef’s First Annual Very Foodie Christmas! Better late than never.
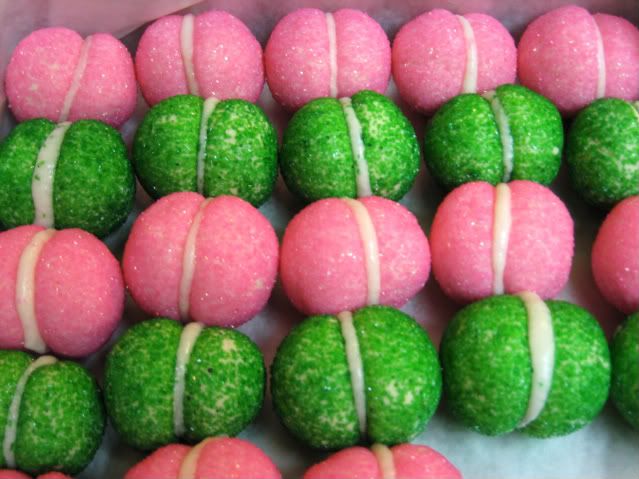
I made these delightful little gems for my grandmother, who is unabashedly obsessed with cookies. They are easy to make and will amaze anyone who is lucky enough to receive them. I must confess I’m a little OCD, so I was painstakingly careful not to get any of the pink sugar on the green cookies and green on the pink. It was a little time-consuming, but worth it in the end.
This recipe was adapted from Shelley Wiseman’s recipe in Gourmet magazine, 2008. I am not a big fan of lemon zest, so I removed it from both the cookies and the frosting. The cookies are much more versatile without it, and I can’t wait to create more fillings to put on them.
For cookies:
1 1/3 cups all-purpose flour
2/3 cup cornstarch
1/4 teaspoon salt
2 sticks unsalted butter, softened
1/2 cup confectioners sugar
1 teaspoon vanilla
Colored sanding sugars
For filling:
1 cup confectioners sugar
1 tablespoon fresh lemon juice
2 tablespoons light corn syrup
1/2 stick unsalted butter, softened
Equipment: a heavy-duty sealable bag
Preheat oven to 350°F with rack in middle.
Line 2 large baking sheets with parchment paper.
Whisk together flour, cornstarch, and salt.
Beat together butter and confectioners sugar with an electric mixer until pale and fluffy, then beat in vanilla. At low speed, mix in flour mixture just until a soft dough forms.
Put sanding sugars in different bowls. Roll a rounded teaspoon of dough into a bowl and drop into colored sugar. I used a small round bowl, and swirled the cookie balls in it. It not only keeps the shape of the cookies, but ensures that they are evenly coated in sugar. Transfer to baking sheet and space about an inch apart.
Bake until tops are slightly cracked but still pale (bottoms will be pale golden), 12 to 15 minutes. Transfer cookies on parchment to a rack to cool completely.
Form and bake more cookies on second baking sheet. I used a different sheet for each sugar color.
Make filling and sandwich cookies:
Beat together all filling ingredients in a large bowl with an electric mixer at medium speed until combined well. Transfer to sealable bag and snip off a corner.
Turn over half of cookies and pipe about 1/2 teaspoon filling on flat side of each. Sandwich with remaining cookies, pressing gently.
*Note: I made these cookies exactly the way the recipe dictated, and they were fantastic. When I make these again (probably on New Year's Eve), however, I will not make them as sandwich cookies because they are hard to eat, and let's face it: they kind of look like little tushies. I plan to simply pipe the filling on the flat side of the cookies, and place frosting-side up so it can set. They will not only be easier to eat, but this will save a lot of time. And you can eat twice as many!
Raisin Almond Granola: The Perfect Stocking Stuffer
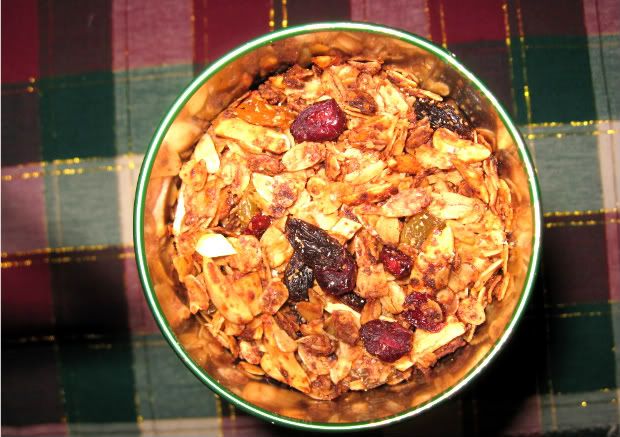
My father likes odd food. He loves everything from canned sardines to quinoa. I saw Alton Brown make some granola bars on “Good Eats” and was surprised by how easy it was. I decided to do the same with an Ina Garten recipe and put it in my dad’s stocking for Christmas a few years ago with wonderful results.
He liked it more than the sweater I bought him.
4 cups old-fashioned rolled oats
2 cups sliced or slivered almonds
1 1/2 cups raisins and/or dried cranberries*
½ cup of wheat germ (optional)
1/2 cup vegetable oil
1/3 cup honey
2 teaspoon ground cinnamon
Preheat the oven to 350 degrees F.
Toss the oats, wheat germ and nuts together in a large bowl. Pour the vegetable oil and honey over the mixture. Add the cinnamon, and stir with a wooden spoon until all the oats and nuts are coated. If it looks a bit too dry, add a bit more honey.
Pour onto two sheet pans so the granola will bake evenly. Do not pack it on the pan. Bake, stirring occasionally with a spatula, until the mixture turns an even golden brown, about 25 to 30 minutes.
Remove the granola from the oven, and add the raisins immediately. Stir to incorporate. If you like a bit more sweetness to your granola, stir in a sprinkle of brown sugar after it has cooled.
Store the cooled granola in an airtight container. If you're giving it as a gift, pour into a festive tin and place a bow ontop. Perfect present, and no wrapping!
This can be eaten alone as a snack or with milk for breakfast. It's healthy and very filling.
*Note: I used Sunmaid’s raisin and craisin mixture. It has red raisins, golden raisins and dried cranberries, and adds wonderful favor to the granola.
Monday, December 28, 2009
Friday, December 18, 2009
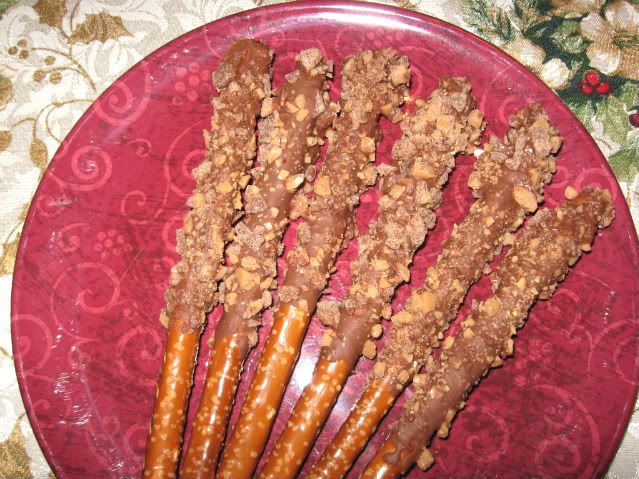
A Very Foodie Christmas: Kira's Awesome Chocolate Toffee Pretzels
A Very Foodie Christmas
Let's face it. Every year, Christmas has become increasingly materialized. Stores have started preparing for the holiday before the autumn leaves even fall. It is all about the gifts, gifts, gifts, and not about counting one’s blessing and being around family. But even though I’m aware of it, even I get caught up in the scramble for stuff. Just twenty minutes ago, I was upset because I couldn't afford to buy my niece a $50 video game (Really, $50?! After you pay $400 for the gaming system?!! How is that legal?!!!!!).
But I love giving gifts, sometimes more than receiving them. During an agonizing time of unemployment, when I didn't have money for big-shiny-WOW gifts, I made them: chocolate-covered pretzels, granola, truffles, fancy cookies, even skin-softening scrubs. I learned that homemade gifts can be more heartwarming that store-bought, especially in this climate. And that giving homemade cookies to your cookie-loving grandmother will actually elicit cheers of joy. Thus, I will be posting some wonderful ideas for the rapidly approaching holiday or any festive occasion.
On Deck: Kira's Awesome Chocolate Toffee Pretzels
I'm going to warn you now: this recipe is hard. To prepare the following dish, it takes a culinary fortitude I'm not sure a lot of you have. It is something I think even Julia Child or an Iron Chef couldn't master. Wait, come back! I'm kidding, just kidding! With the holidays looming like a tidal wave, no one has time for complicated, involved recipes. People need quick, easy ones they can whip up the night before a work holiday party with the kids or in a few hours before heading to a realitve's house. This is it. It's a bit messy, but that is half the fun, especially when melted chocolate is involved!
These little gems are not an entirely original idea, but they are ingenius, fun, and a wonderful addition to any holiday-themed menu. I started making these last year for a christmas party with my writer's group. They went over so well that I get requests to make them, and the guests actually squabble over the leftovers at the end of the evening. Make a batch of these, add a plastic bag and a festive ribbon and you have yourself a wonderful holiday gift for family, friends and co-workers.
Ingredients
1 Bag Salted Pretzel Rods
2 12oz Bags of Milk Chocolate Chips
2 Bags of Toffee Bits
Parchment Paper
Pour the toffee bits into a shallow pie plate or dish.
Cover a cookie sheet with parchment paper.
In a double-boiler (or a pot of simmering water with a metal bowl on top), add the chocolate chips. Stir with a stapula until chocolate is completely melted. Remove from heat.
Dip pretzels in the chocolate, covering them about two-thirds of the way. Holding the pretzel by the end, and shake off the excess chocolate. Immediately transfer the pretzel to the shallow dish and turn and cover with the toffee. Place onto the parchment paper. Repeat.
If chocolate becomes stiff, reheat the water and return chocolate to a double-boiler.
Note: I usually start with one bag of chocolate and one bag of toffee and melt more as I need it.
When all pretzels are coated, place in the freezer until the chocolate is complete set. Serve within two to four days.
You will probably have some gooey, chocolatey morsels of toffee left over. Oh, the horror!
Friday, December 4, 2009
Saturday Chef Original: Quick Breakfast Hash
When I was a child, I was a meat-and-potatoes-girl. While my friends and cousins clamored for Happy Meals and fish sticks, my favorite meal was Mary's Kitchen Corned Beef Hash, green beans and toast with grape jelly. Obviously, it was a rare treat as canned corned beef hash is an eventual heart attack in a can, but it was worth it. The foodie in me hates to admit that it still is.
Unfortunately, now it is harder to eat my beloved hash without bouts of panicked guilt and chest pains that are probably more hypochondria than physiology; thus I created a recipe that is a scrumptious substitute and thankfully anxiety-free.
This recipes is extremely versatile. I have made it with both ground turkey and ground veal. Although, since I’m sure most of you still have twelve pounds of turkey in the fridge, you probably want to try the veal.
Ingredients
1 lb. ground turkey or veal
1/3 to 1/2 cup onion, finely chopped
Olive Oil
1 to 1 ½ pounds baby red potatoes, cubed
Parsley (optional)
Seasoning Salt, Pepper
Cube red potatoes in small, uniform pieces rinse thoroughly in cold water. Place in pot cover slightly with water. Add pot to heat and boil.
Chop onions. In a separate skillet over medium high heat, sauté onions in a drizzle of olive oil for about 2 minutes. Add ground meat, and use wooden spoon to stir and break apart. Season as you wish. Add a handful of fresh parsley or parsley flakes for color. Cook until meat is no longer pink. Remove from heat.
Boil potatoes until slightly soft, about 4-6 minutes. Drain thoroughly. Pour potatoes in the largest skillet you have, and add a bit more oil. Season with seasoning salt and pepper. Cook for two minutes.
Add meat mixture and a bit more oil, pressing down with the back of wooden spoon to brown. After 2 minutes, stir. Repeat process 2 or 3 more times or until meat is done and a slight crust develops. Season to taste.
Serve with over-easy egg and toast.
*Note: It is always better to have more potatoes than hash. The potatoes will degrade when they are soft. It also tastes even better the next day.
Coming Soon: A Very Foodie Christmas; Edible Gift Ideas for Your Foodie Friends!
Labels:
beef,
breakfast,
food blog,
Mary's Kitchen Corned Beef Hash,
turkey
Subscribe to:
Posts (Atom)